In my previous post I spoke about how to make curl fields to quickly approximate the effects one would see during a fluid sim. The effect works good enough if you’re only looking to sim around a second or so into the future, but it quickly breaks down after that. In order to create something a bit more realistic, we have to take two important properties of a fluid sim into account: Viscosity and Diffusion.
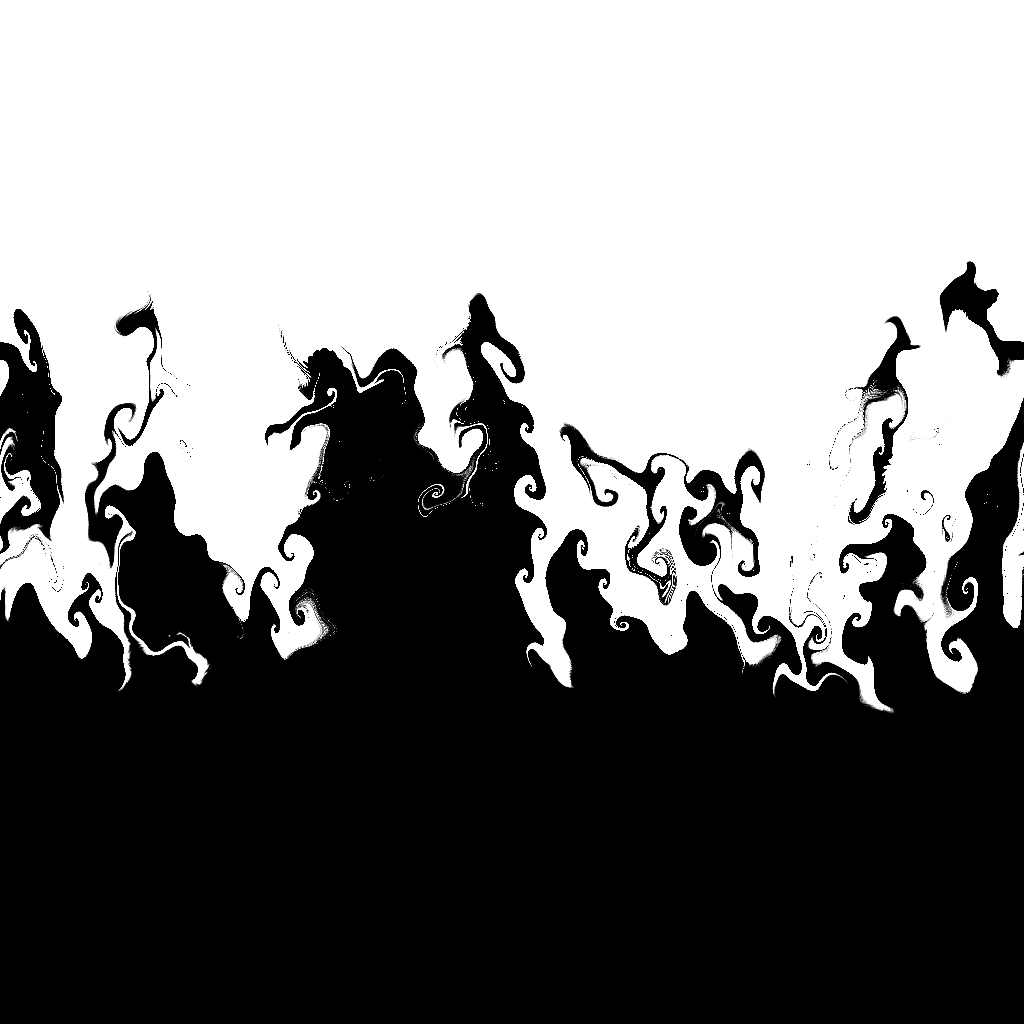
Viscosity is actually really simple. You just have to blur the vector field that you’re warping your image by. In our case, it’s the curl field that we learned how to generate in the Curl Fields post. Diffusion is also a blur, but it’s applied to the areas of the warped texture based on the intensity of the vector field we’re using to warp the image. To achieve a good result, we run about 6 iterations, blurring the textures every step. The strength of the blur that is applied to the vector field is the Viscosity value, and it is multiplied by the “Warp” strength. Diffusion is the strength of the blur that is applied to the image we’re warping, which is also applied every step. In the GIF below, you can see how the portions of the texture that are being warped gets blurred out a bit - this is the Diffusion in practice. Later in the GIF you’ll see the curls and warping “relax” a bit - this is the effect of viscosity.
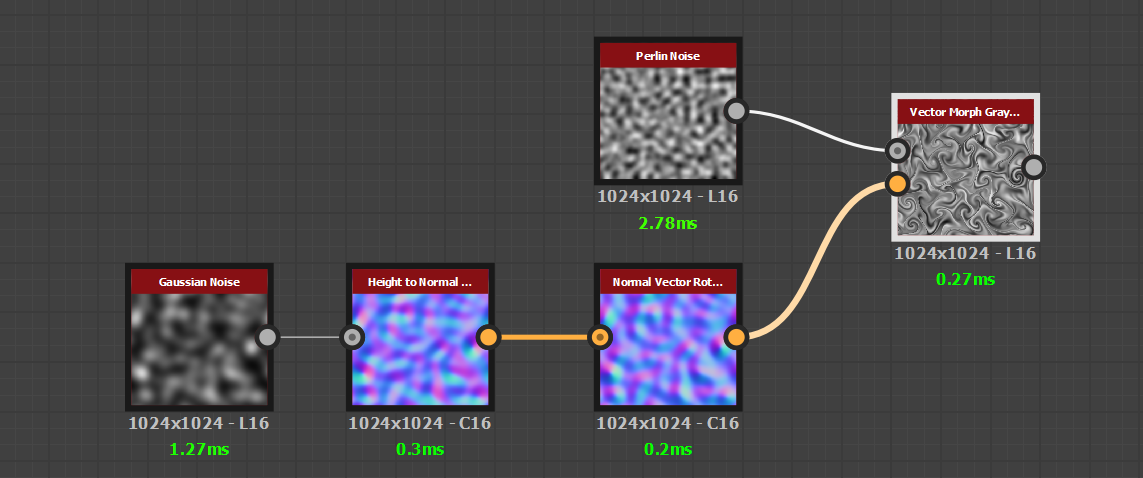
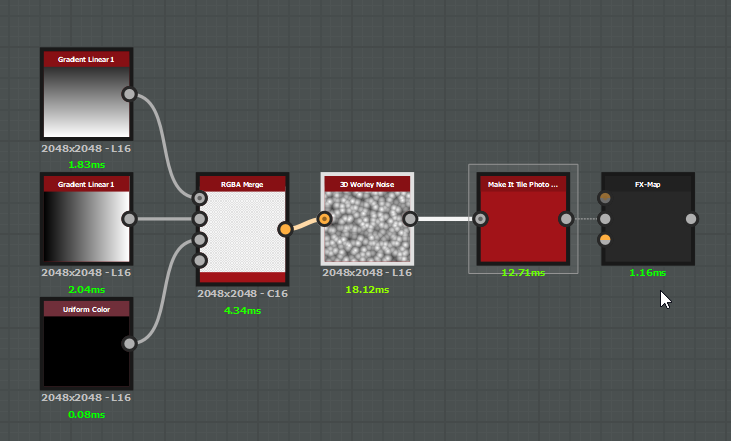
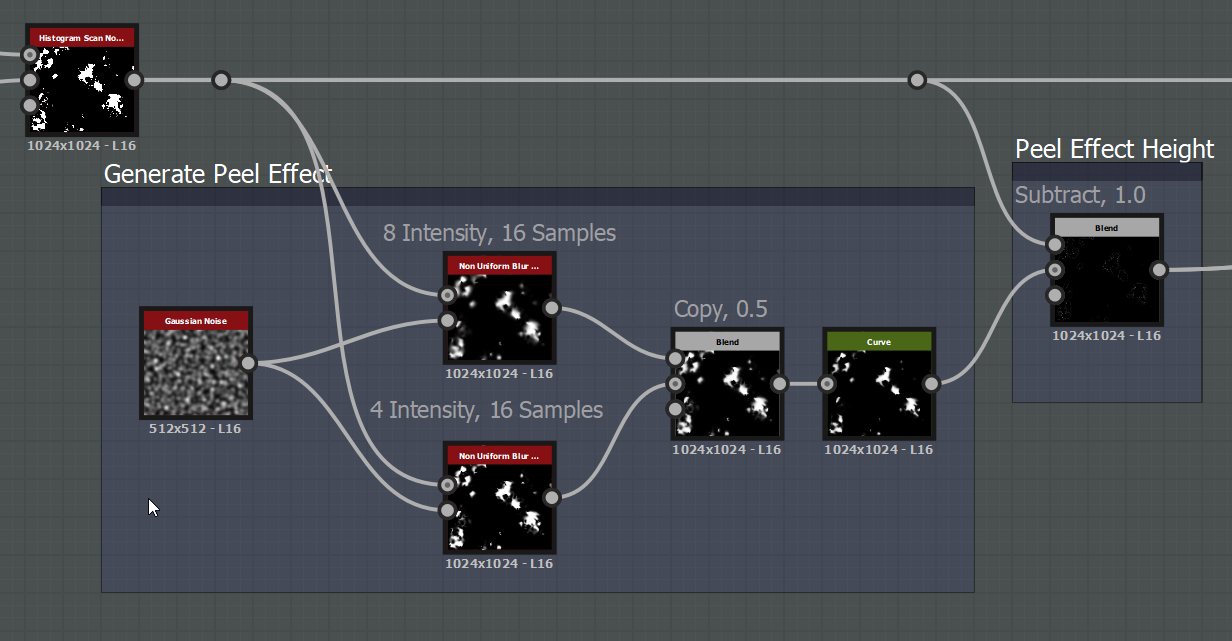
Below is a break down of the node, which you can now download for free on substance share.

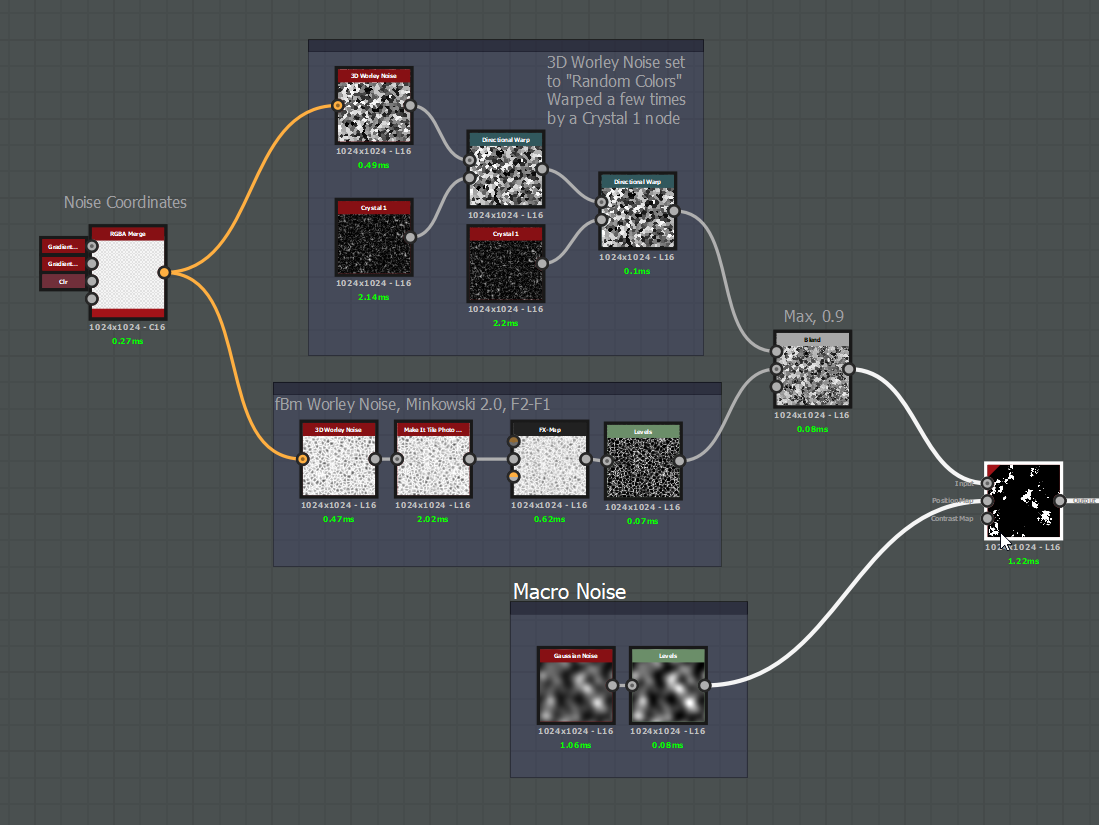
You can see here that the node graph is pretty basic - it’s just 5 iterations of the same node expressions which you can see below.
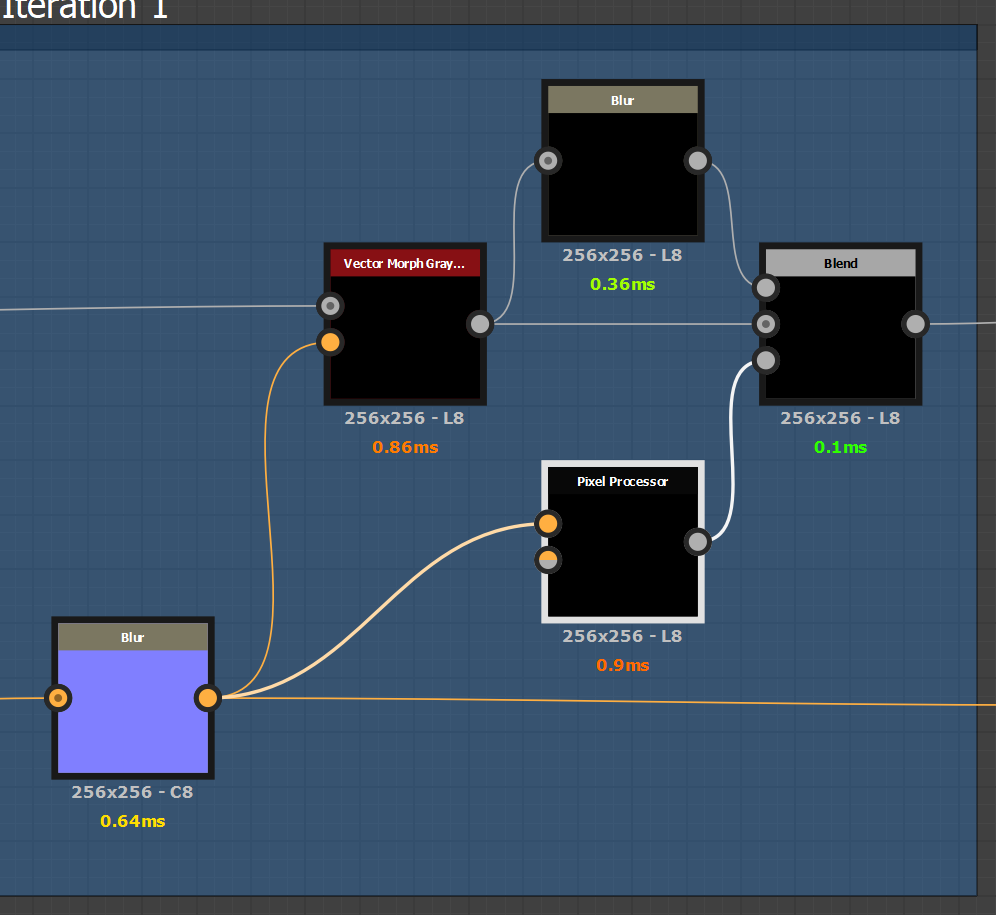
An example of one of the iterations. We run a vector morph with a blurred version of the curl map (The blur amount is Viscosity). Then we blur the result by the divergence mask (See below) - and that gives us our diffusion. Then we pass it along to the next iteration.

Inside the Pixel Processor node, i calculate absolute divergence. All this does is calculate the absolute slope of the x and y components of the normal map, then add them together and divide by the inverse of the texture size. This gives me a nice mask where the white values correspond with areas of high fluid movement, where areas of no fluid movement remain black. To be honest this might be overkill and there could be an easier way to approximate this, but whatever.
This mask is used to mask the diffusion blur - so the more intense the vector field is, the more diffusion happens!
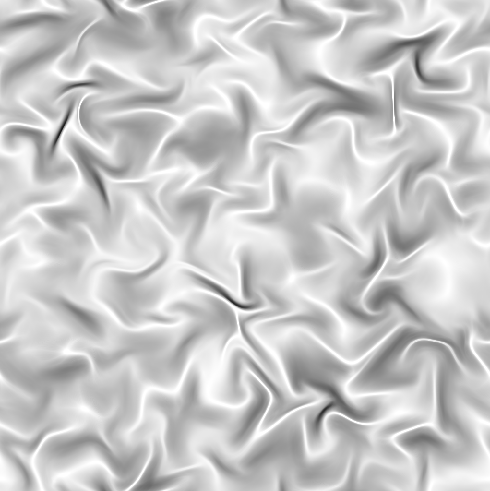
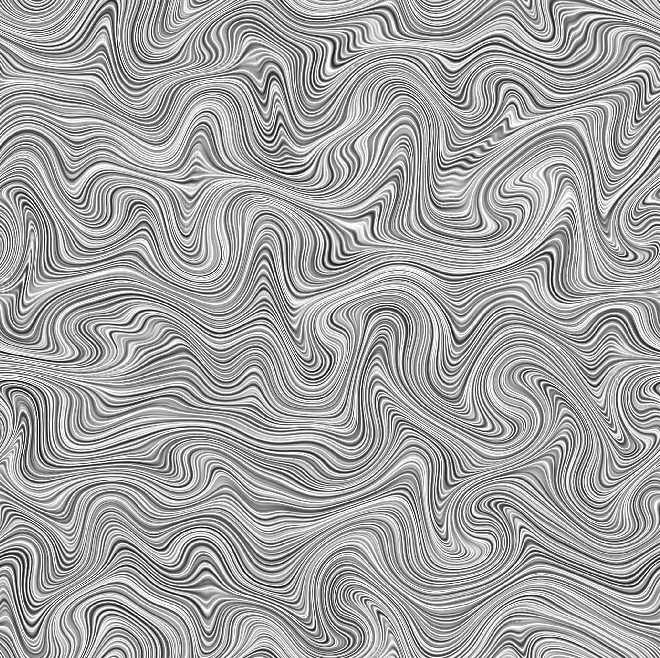
So yeah this node is cool for generating some organic swirly things which is just another tool in the tool belt. Enjoy a couple quick examples below.

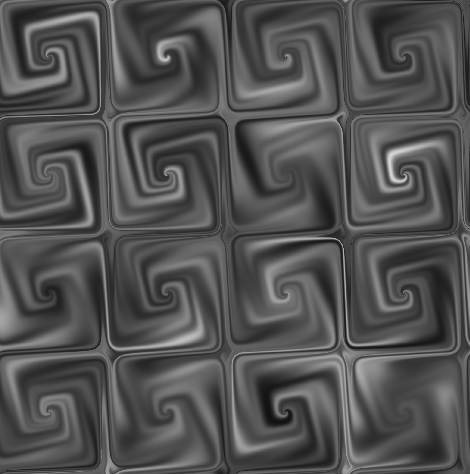
Example of using curl noise to add interesting decorative patterns to a tiling floor texture.
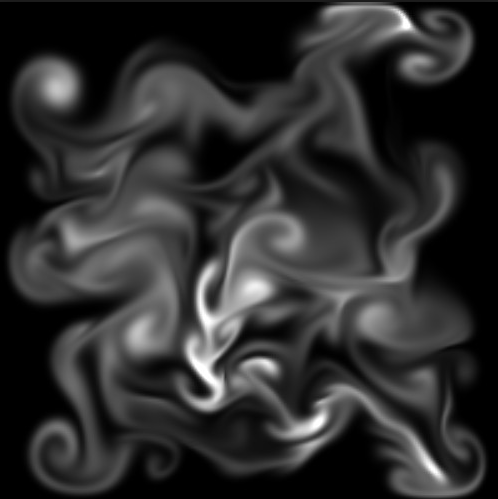
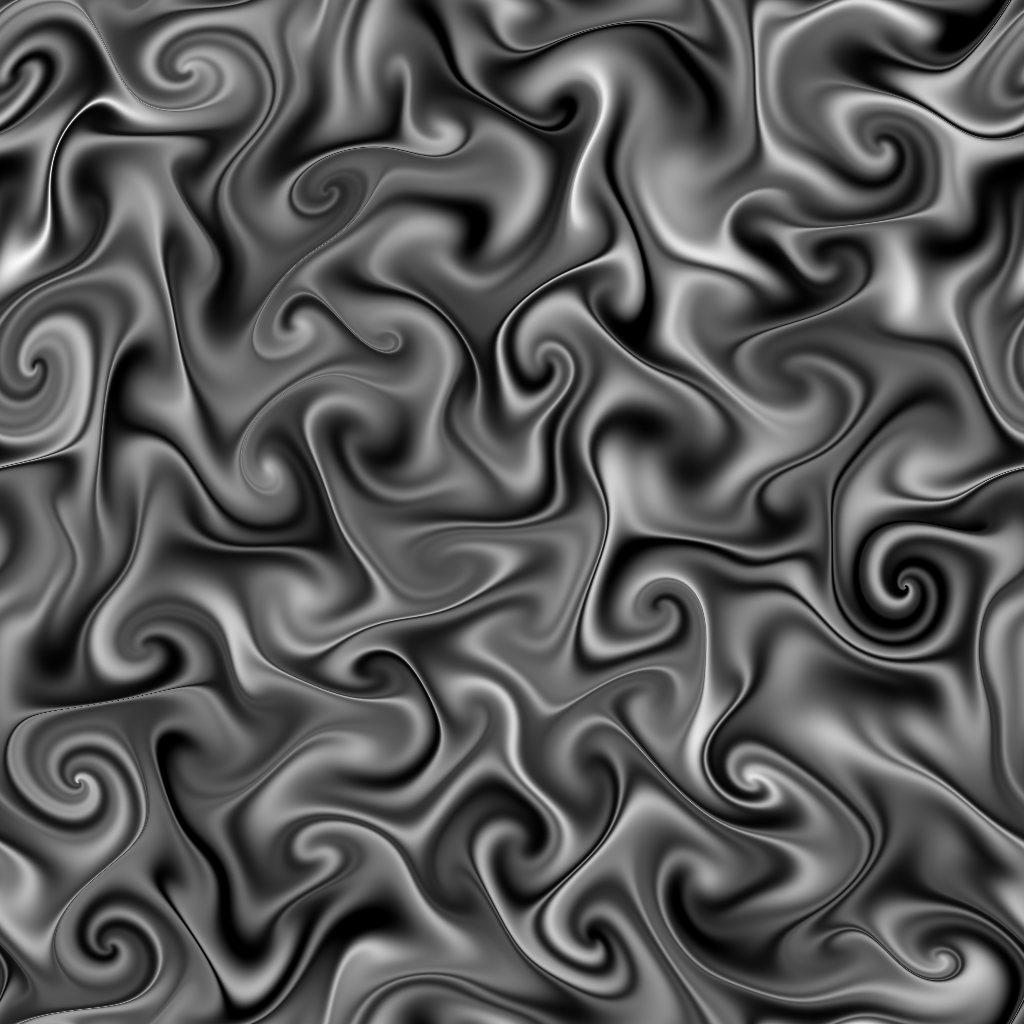
Anisotropic Noise Fluid Warped by Gaussian Noise
Thanks for reading, and Happy Holidays!