Volume Texture assets are a new feature that shipped with Unreal Engine 4.21. It flew under the radar because the release notes don't mention the addition of the new feature. Fortunately, there is documentation on how to create and use them. They may not seem very useful at a glance, but they have numerous applications. I'll walk you through how to create them and show you some examples of their use.
But before we get into it, let’s take a moment to learn what a volume texture is. A normal texture is a two-dimensional grid of pixels. It has a length and a width. A volume texture has a third axis, which you can think of as a "stack" of textures on top of each other. So, if you defined a volume texture to be 32x32x16, it would consist of 16 32x32 pixel images packed on top of each other. You can put whatever images you want into a volume texture as long as they all have the same length and width dimensions. This is visualized in the image below - The transparent green represents the volume texture, and the “slices” are visualized as a “pseudo volume texture” next to it.

In this article, I’m going to go over how to create volume textures and show you how to apply them in various ways.
Creating Volume Textures
Pseudo Volume Textures
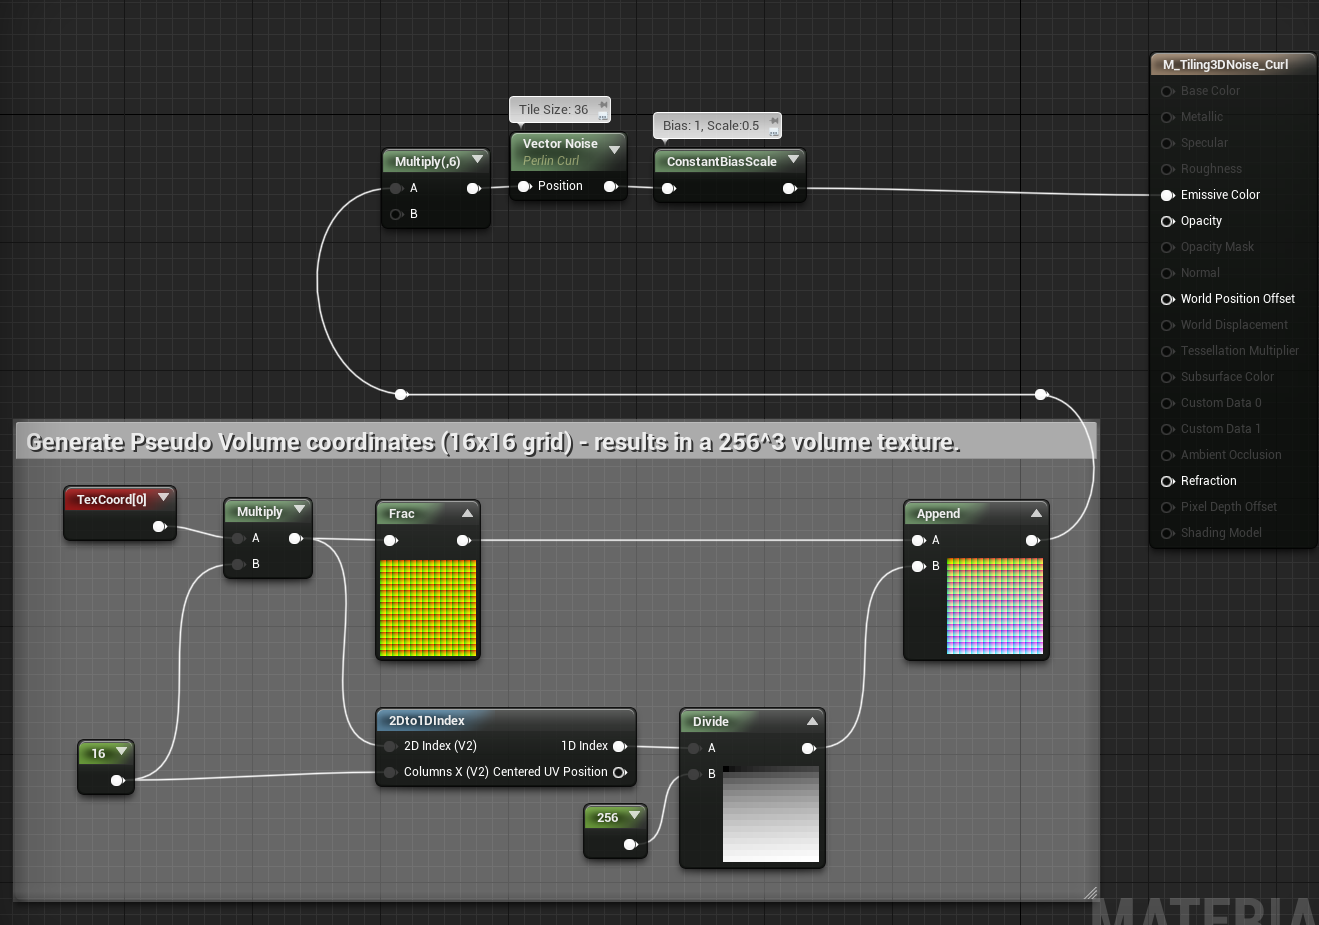
Creating volume textures first requires you to make a Pseudo-Volume Texture. These are 2D textures that store “slices” of a volume in rows and columns. This is visualized in the GIF below where I am creating a pseudo-volume texture which stores the density information of a sphere. The pixels that are inside the sphere are colored white, and the pixels on the outside are colored black. They are then arranged into a 2D texture that holds 3D information, hence the “Pseudo” name.
Ryan Brucks from Epic Games has a series of blog posts all about pseudo-volume textures and authoring them in UE4. I recommend reading up on Authoring Pseudo Volume Textures. There is plenty of information there that he explained very well, and I’ll be repeating some of that information in this article.
One of his posts I do want you to check out is the one on how to generate tiling noise textures. The process outlined in his post from 2016 was before the volume texture asset was available, and the method to generate and sample pseudo-volume textures was quite involved. Unfortunately, It was the only way to do it at the time. Fortunately, with the advent of Volume Textures, we get to cut out all the custom code and extra material functions that needed to be written in order to create and sample seamless tiling 3D Noise textures! It’s so much easier now. Lets explore.
Enable Volume Textures
As of 4.23, you have to enable volume textures by editing your DefaultEngine.ini file. So go to your project directory’s Config folder, find DefaultEngine.ini (if it doesn’t exist, create it). Then navigate to the Render Settings section (if you don’t see that section, you can create it) and add “r.AllowvolumeTextureAssetCreation=1”. I have an example below.
[/Script/Engine.RendererSettings]
r.AllowVolumeTextureAssetCreation=1
Create the Noise Material
For this example, let’s render some tiling Voronoi noise with 6 octaves. High quality Voronoi Noise is notoriously expensive at ~600 instructions, so it’s the perfect type of noise to cache to a Volume Texture.

Create a new unlit material and set it up like the above image. The Noise node’s parameters can be seen in the bottom left hand part of the image.
Create a Render Target and a Blueprint for Rendering to It.
Next, create a Render Target Asset and set its size to 4096x4096 and the Render Target Format to RGBA8. Then create a Blueprint Actor and in the Event Graph, create a Custom Event and name it something like “Draw To Render Target”. Select the event node and enable “Call In Editor”. Add a “Draw Material To Render Target” node and wire it to the custom event. Reference your newly created Render Target asset in the “Texture Render Target” property, and then reference your Noise Material in “Material” property.

Compile the blueprint and drag it into the scene and click the “Draw to Render Target” button that you should now see in the “Default” category of its Details. You should see your material drawn to the Render Target asset. If you don’t, you might have to open the Render Target asset and disable the “Alpha” channel to see what’s in there.
Generate the Volume Texture
Next, Right-click the Render Target asset and choose “Create Static Texture”. This will make a Texture object in the same folder as your Render Target asset. This “static” texture is what we use to generate the volume texture. Right-click on that bad boy. If you edited the “DefaultEngine.ini” file properly, you should see an option near the top that says “Create Volume Texture”
Doing so will make a Volume Texture asset. Name it something cool like “VT_WorleyNoise” and wait a few seconds as it processes. Open up the Volume Texture and Enable “Compress Without Alpha” since we don’t have one. This will reduce the memory footprint of the asset. Next, go to View>Viewmode and enable “Trace Into Volume” This will create a visualization of your Volume Texture that you can rotate around and play with.

Create a Material for Testing the Volume Texture
Now that we’ve got a volume texture made, lets create a material to test it out. In order to sample a volume texture, you need to bring out a special type of sampler node called a Texture Sampler Parameter Volume. Remember, since it’s a volume texture you’ll need a float 3 for the UVs. I typically use World Space divided by a “Tile Size” parameter.
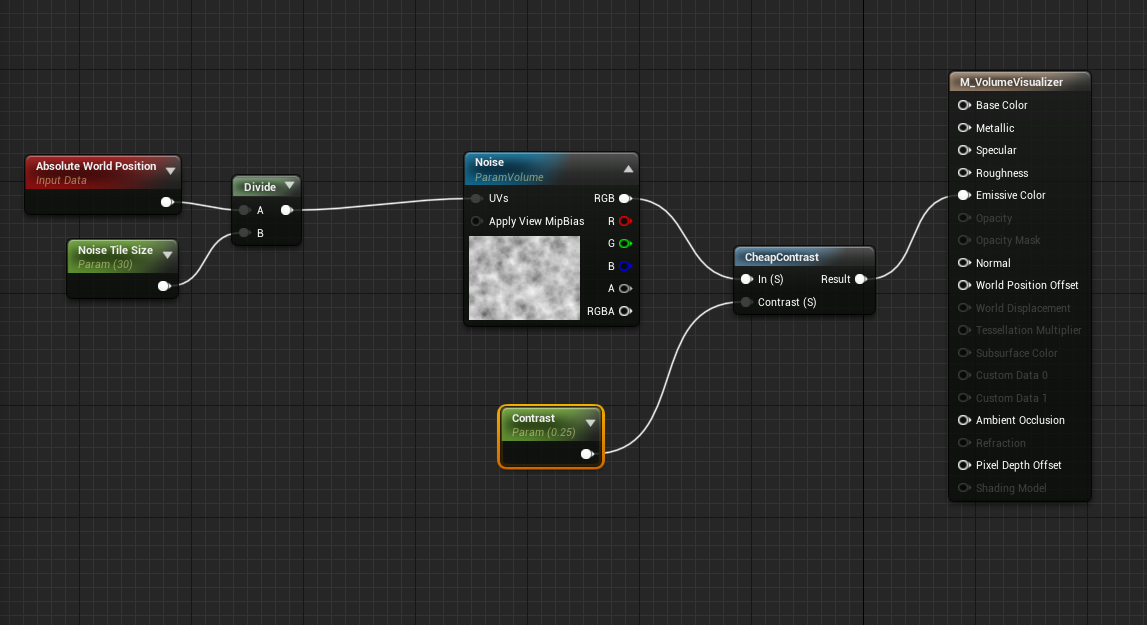
When dragging the object through the scene, you’ll see the 3D change since we’re sampling from World Space. If you don’t want that to happen, sample from “Local Space” instead.
Caching the Voronoi noise to a volume texture saves us around 600 instructions for the cost of around 10MB at a 256^3 texture size. If your budget is tight, setting the maximum texture size to 128 brings the resource cost down to under 1.2MB for not that much visual difference.
Bake some Curl Noise
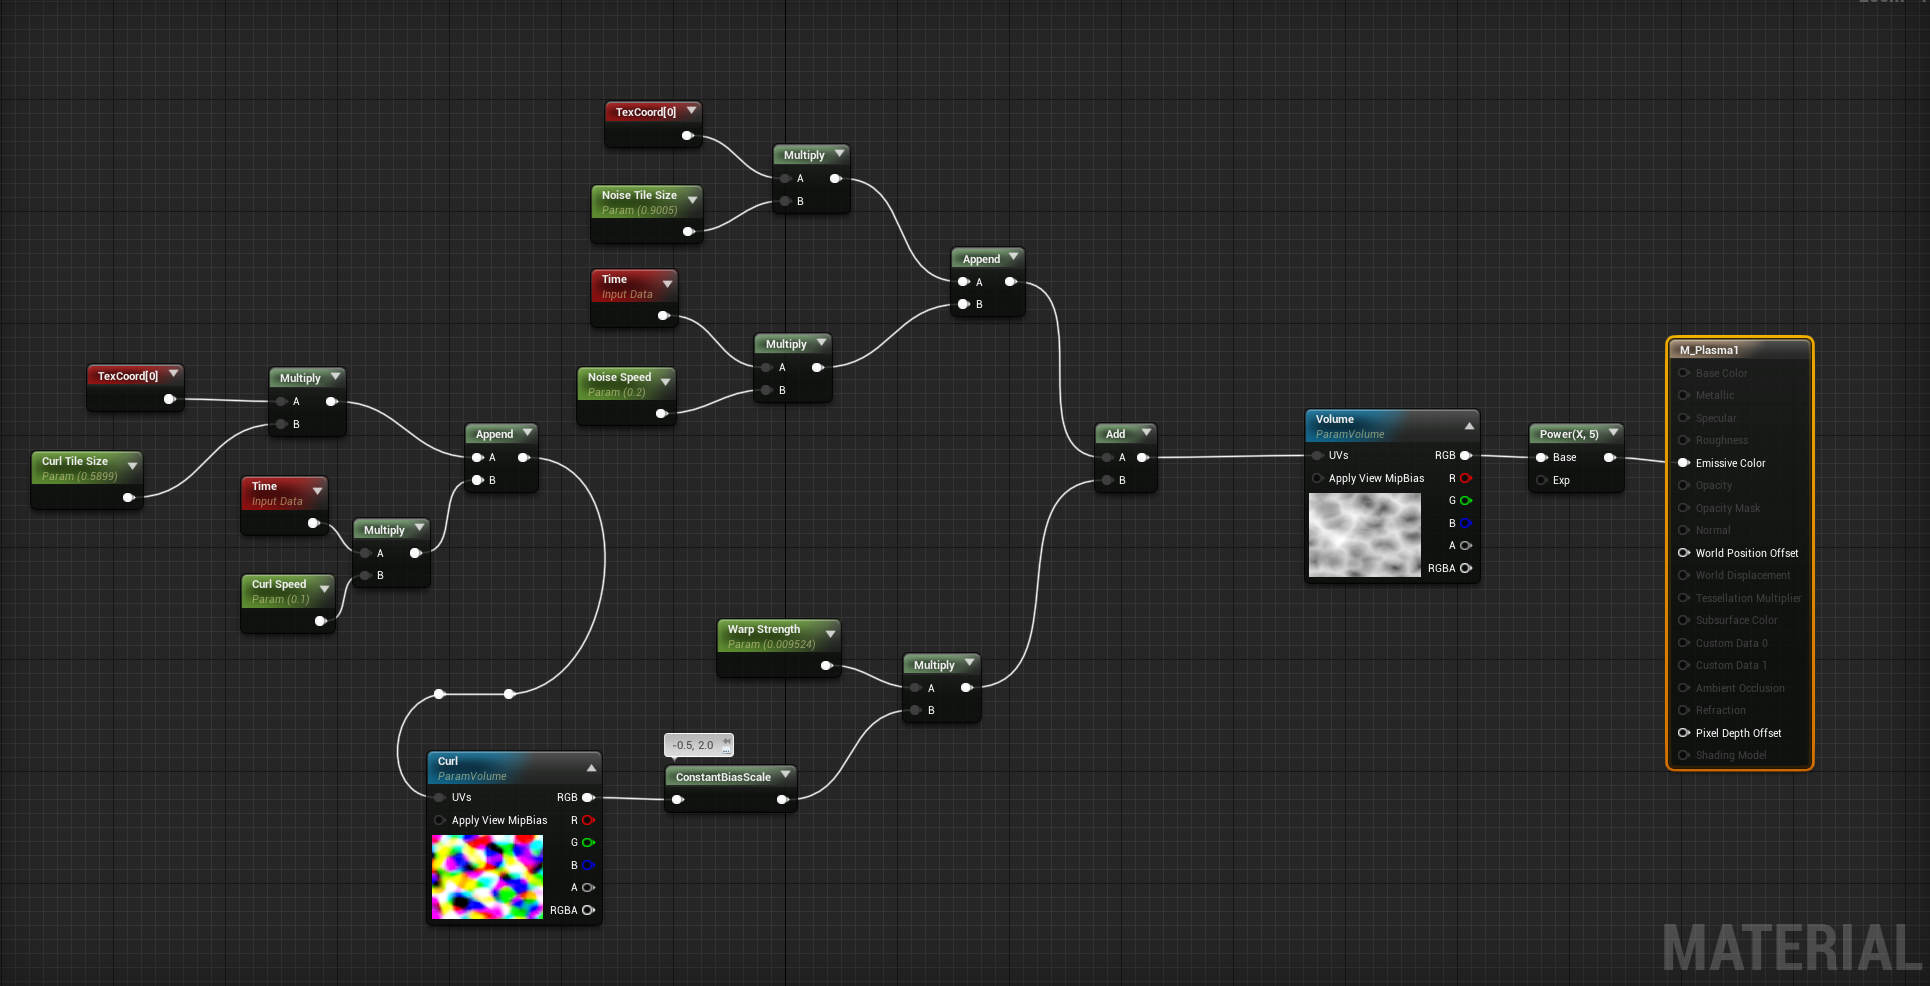
Don’t stop with Voronoi Noise! I also like to bake vector noises such as Perlin Curl into a 3D Texture as well. These types of vector noises store directional information that can be useful for warping UVs
Above is a 3D Texture of Perlin Curl Noise - I used the Vector Noise node to generate this. Getting it to tile is a bit tricky, though. I had to multiply my UVs by 6 and use a Tile Size of 36 on the Vector Noise node. You then have to remap the values into the 0 to 1 range when you bake it out. When sampling from this volume, remember to map the values back into the range of -1 to 1.
Applications
Now that you’ve got all these beautiful volume textures at your disposal. Let’s take a look at some of their applications.
Visual Effects
I love to sample these textures with a mesh’s UV Coordinates and append a Time term to the W coordinate to “push” the UVs through the Volume texture.
You can see the setup in the image below and the resulting visuals to the right. It creates a pretty cool animation that would be very difficult to recreate with 2D Textures.

We can further improve visuals by sampling our Curl Noise using the same technique and using it to warp the UVs of the original noise texture to create more interesting effects. Combining multiple noises and multiple warps can produce a whole variety of visuals.
The above shaders were all created using the techniques above with some simple adjustments to UV size and warp strength. You can go even further by panning the textures on their U or V axis. This is how the fire in the above GIF was created. It looks quite natural and it’s hard to spot any repeating elements since all of the textures are panning on multiple axes at different speeds.
Volumetric Fog
Adding a bit of texture definition to volumetric fog is another great use case for volume textures. Without the textures themselves, you’d have to use the noise nodes in your materials which can be very costly. Baking them down simplifies the cost of the shader a great deal and allows more complex effects without becoming prohibitively expensive to use. We used these all over the place on Borderlands 3.
In the above image, I’m using a shader that samples a warped Voronoi noise with a 3D spherical mask for use with volumetric fog. The scene was taken from the Multi-Story Dungeons kit that you can get on the UE4 Marketplace. I applied the shader to a simple sphere static mesh, which is then used to render a volume into the scene. Documentation for using Volumetric Fog can be found here. Other examples can be found on Ryan Bruck’s blog post titled UE4 Volumetric Fog Techniques. That post is a couple of years old now, and you can see the way things had to be done before the volume texture asset was a thing.
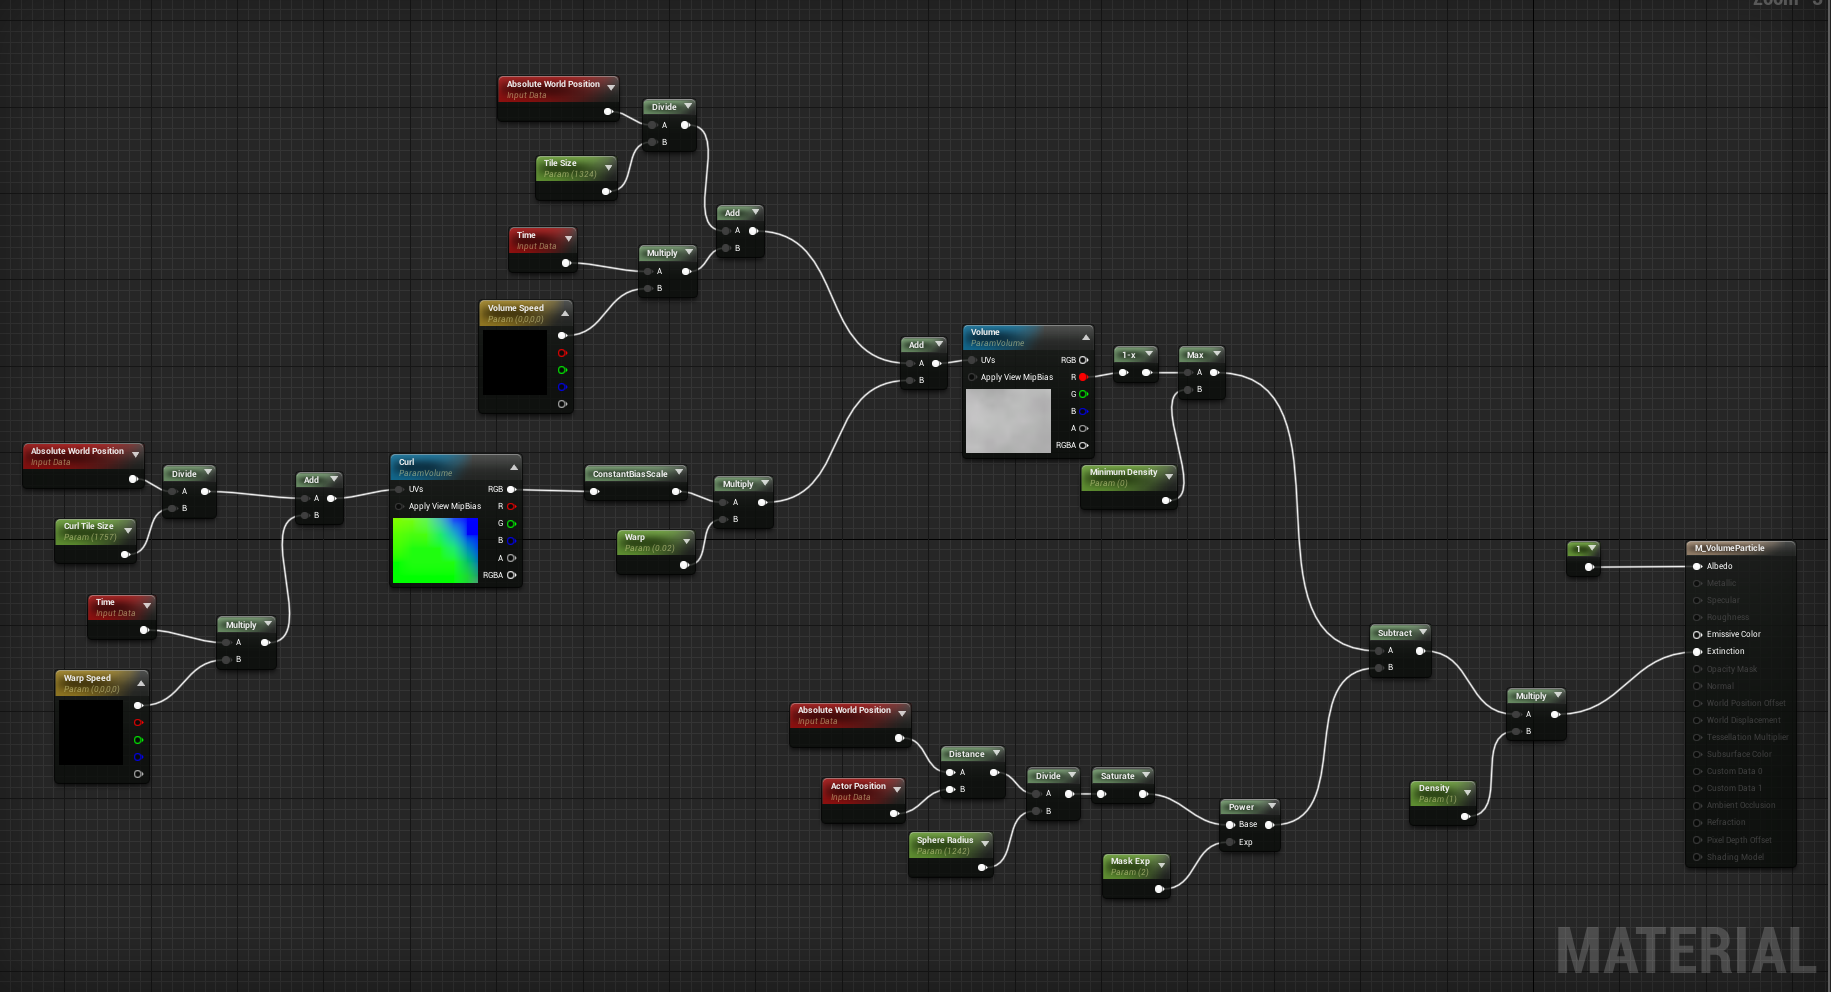
Don’t forget to set your material domain to “Volume”
Clouds
Ray Marching is an incredibly complicated and expensive technique, but it can be used to render beautiful cloudscapes like those seen in Horizon Zero Dawn, Red Dead Redemption 2, and a few other open-world games.
In fact, the technique in the video above is not possible without using a few different tiling volume textures. For more information on this technique, you can check out their paper. They also have a detailed guide on how to create this in GPU Pro 7 (Chapter 4). If I get some time, I hope to walkthrough how this effect can be accomplished within UE4.
Final Thoughts
Volume textures are easier than ever to create and work with in the Unreal Engine. With the addition of Volume Texture assets and the tools that automatically create them from Pseudo Volume Textures, you' can get up and running with them quicker than ever. I encourage everyone to integrate these textures into your visual effects and environment art pipelines. Obviously, all of the applications cannot be covered in a single post, but I hope to how everyone ends up using these. Thanks for reading!
Ryan